Pre-Setup Requirements:
1. Administrator access to your LMS
Specific Schoology instructions for setting up LTI 1.3 can be found here:
https://developers.schoology.com/app-platform/lti-apps/
LMS Setup (Canvas is used for this example)
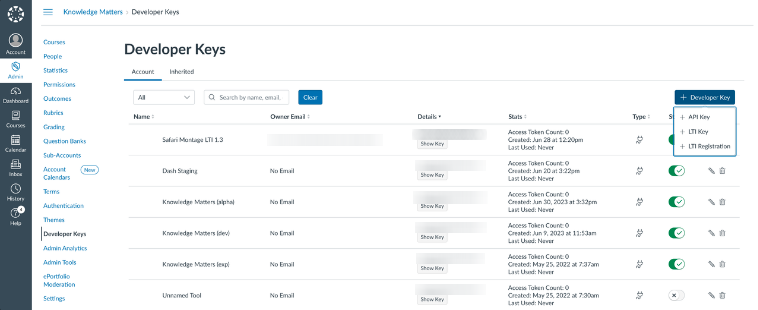
1. Login and navigate to the developer keys section and add an LTI key by clicking on the +LTI key button:
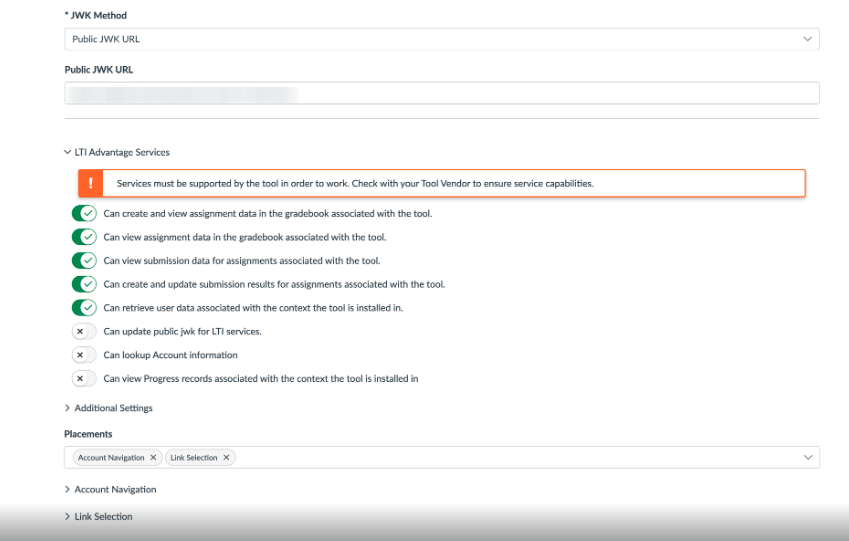
2. When configuring the LTI 1.3 connection, you are to utilize the following information:
Redirect URIs: https://lti-dash.edynamiclearning.com/lti/launch
Target Link URI: https://lti-dash.edynamiclearning.com/lti/launch
OpenID Connect Initiation Url: https://lti-dash.edynamiclearning.com/lti/1.3/login
Public JWK URL: https://lti-dash.edynamiclearning.com/lti/1.3/jwks.json
3. Configure the LTI Key as seen here:
4. When the configuration is complete and the LTI key is created, you will need to take note of the Client ID:

The following information will need to be passed back to Support@learningblade.com:
Client ID
Issuer
Key Set URL
Authentication Token URL
Authentication Login URL
Once this information is passed back to Support. Support will complete the LTI 1.3 configuration setup and provide you with course download instructions.
Was this article helpful?
That’s Great!
Thank you for your feedback
Sorry! We couldn't be helpful
Thank you for your feedback
Feedback sent
We appreciate your effort and will try to fix the article